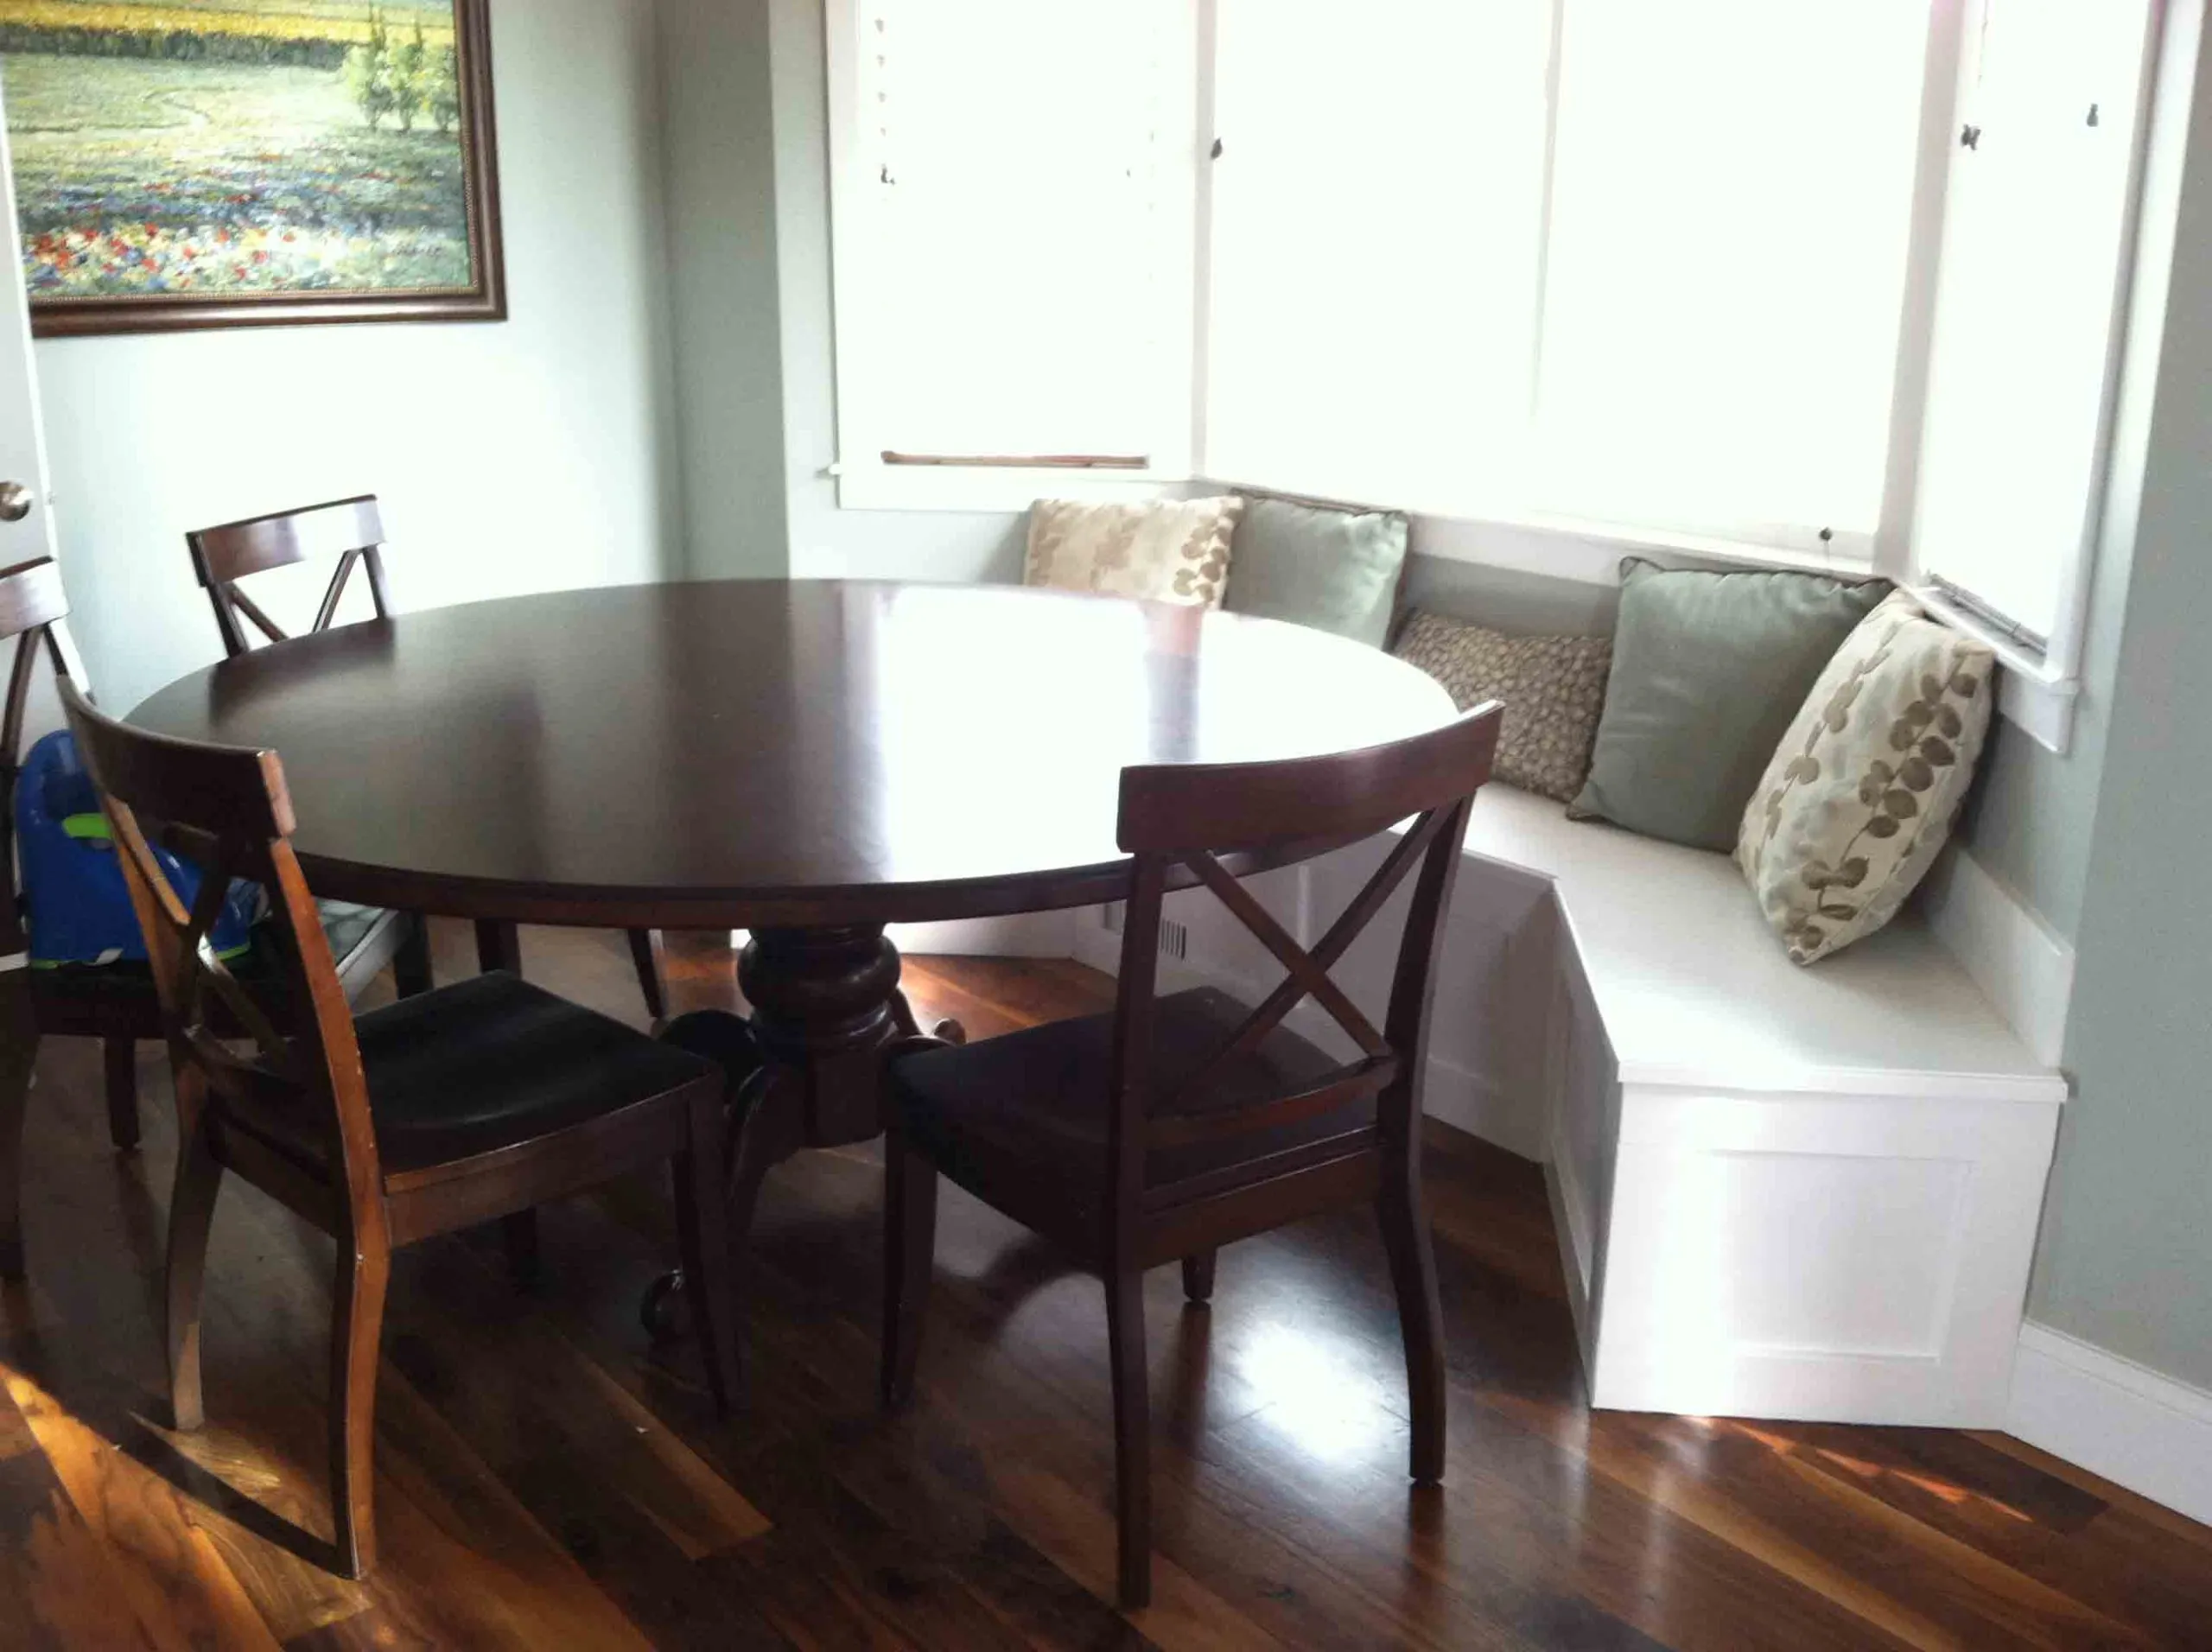
Many of our new home designs have the option to add a bay window in the nook or master bedroom. This area can be perfect for a simple seating arrangement or just a little more space for the dining room table. Another great way to utilize a bay window is to add a built-in banquette. This DIY project takes some time and a few tools, but the result is fantastic. My husband and I recently created a built-in banquette in our new home by McArthur Homes for less than $200. Here’s how:

Step One
Remove the baseboards and built a sturdy 2×4 frame. The boards can be nailed or screwed directly into the studs on the walls.
Step Two
Cover the frame with MDF or plywood. Here we used some 3/4″ cabinet grade plywood that we had from another project. We nailed it in using finish nails and our nail gun. As you can see, we also cut a small hole for an air vent because our heater vent would now be located inside the bench.
Step Three
Add 3-1/2″ wide MDF to create a panel look. Don’t worry too much if the pieces don’t fit together perfectly, this can be fixed with caulk.
Step Four
Cut your top using thick MDF. We used 1-5/8″ MDF (also from another project). We cut the top in three pieces. First the middle piece, which we wanted to use as a hinged lid for storage access. Next we used butcher paper (you can also use newspaper) to create a template for the two side pieces. I was worried that if we just tried to measure all the angles we wouldn’t get a good fit. The paper template method worked like a charm. We just traced our template onto the MDF and then cut along the lines. We also used a router to add a nice finished edge. Nail your top to the 2×4 frame.
Optional Storage Lid
If you want your bench to also work for storage, you will need to cut about a 1-1/2″ piece off the entire back length of your middle top piece. Nail just the thin piece to the 2×4 supports then place the rest of your top in place and use a piano hinge (sold at Home Depot etc.) to attach the two pieces back together. As seen in the photo below (part of the 1-1/2″ piece is covered by our back molding, but you can see how the hinge attaches).

Step Five
Caulk and paint your bench with a nice semi-gloss finish for easy cleaning. There is a great tutorial on caulking that I like on Remodelaholic.
Step Six
Add a cushion or some throw pillows and enjoy your new banquette!

Calling all McArthur Homes homeowners- we want to see your great DIY and decorating projects. What have you done to make your new home in Utah your own? Email [email protected] with your projects. If we feature them on our blog, we will also send you a gift certificate for a local restaurant.